
Learn Together
Following directions while creating your bracelet develops working memory! This activity is also great to practice counting — count 8 dashes on your cardboard circle, count 7 strings to cut, count 3 strings each time you add to your bracelet.
Watch the Friendship Bracelets video on CMOM’s YouTube Channel and follow along! Use these directions for help:
Materials
- Cardboard
- String
- Scissors
- Pen or pencil
- Cup
Make Together
Watch the Friendship Bracelets video on CMOM’s YouTube Channel and follow along! Use these directions for help:
- Place a cup upside down on top of cardboard. Trace the circle using a pen or pencil onto the cardboard.
- Cut the circle out.
- Draw a dot in the middle of your cardboard circle. Poke a hole through the cardboard on the dot using scissors or a sharp pencil. For this part,
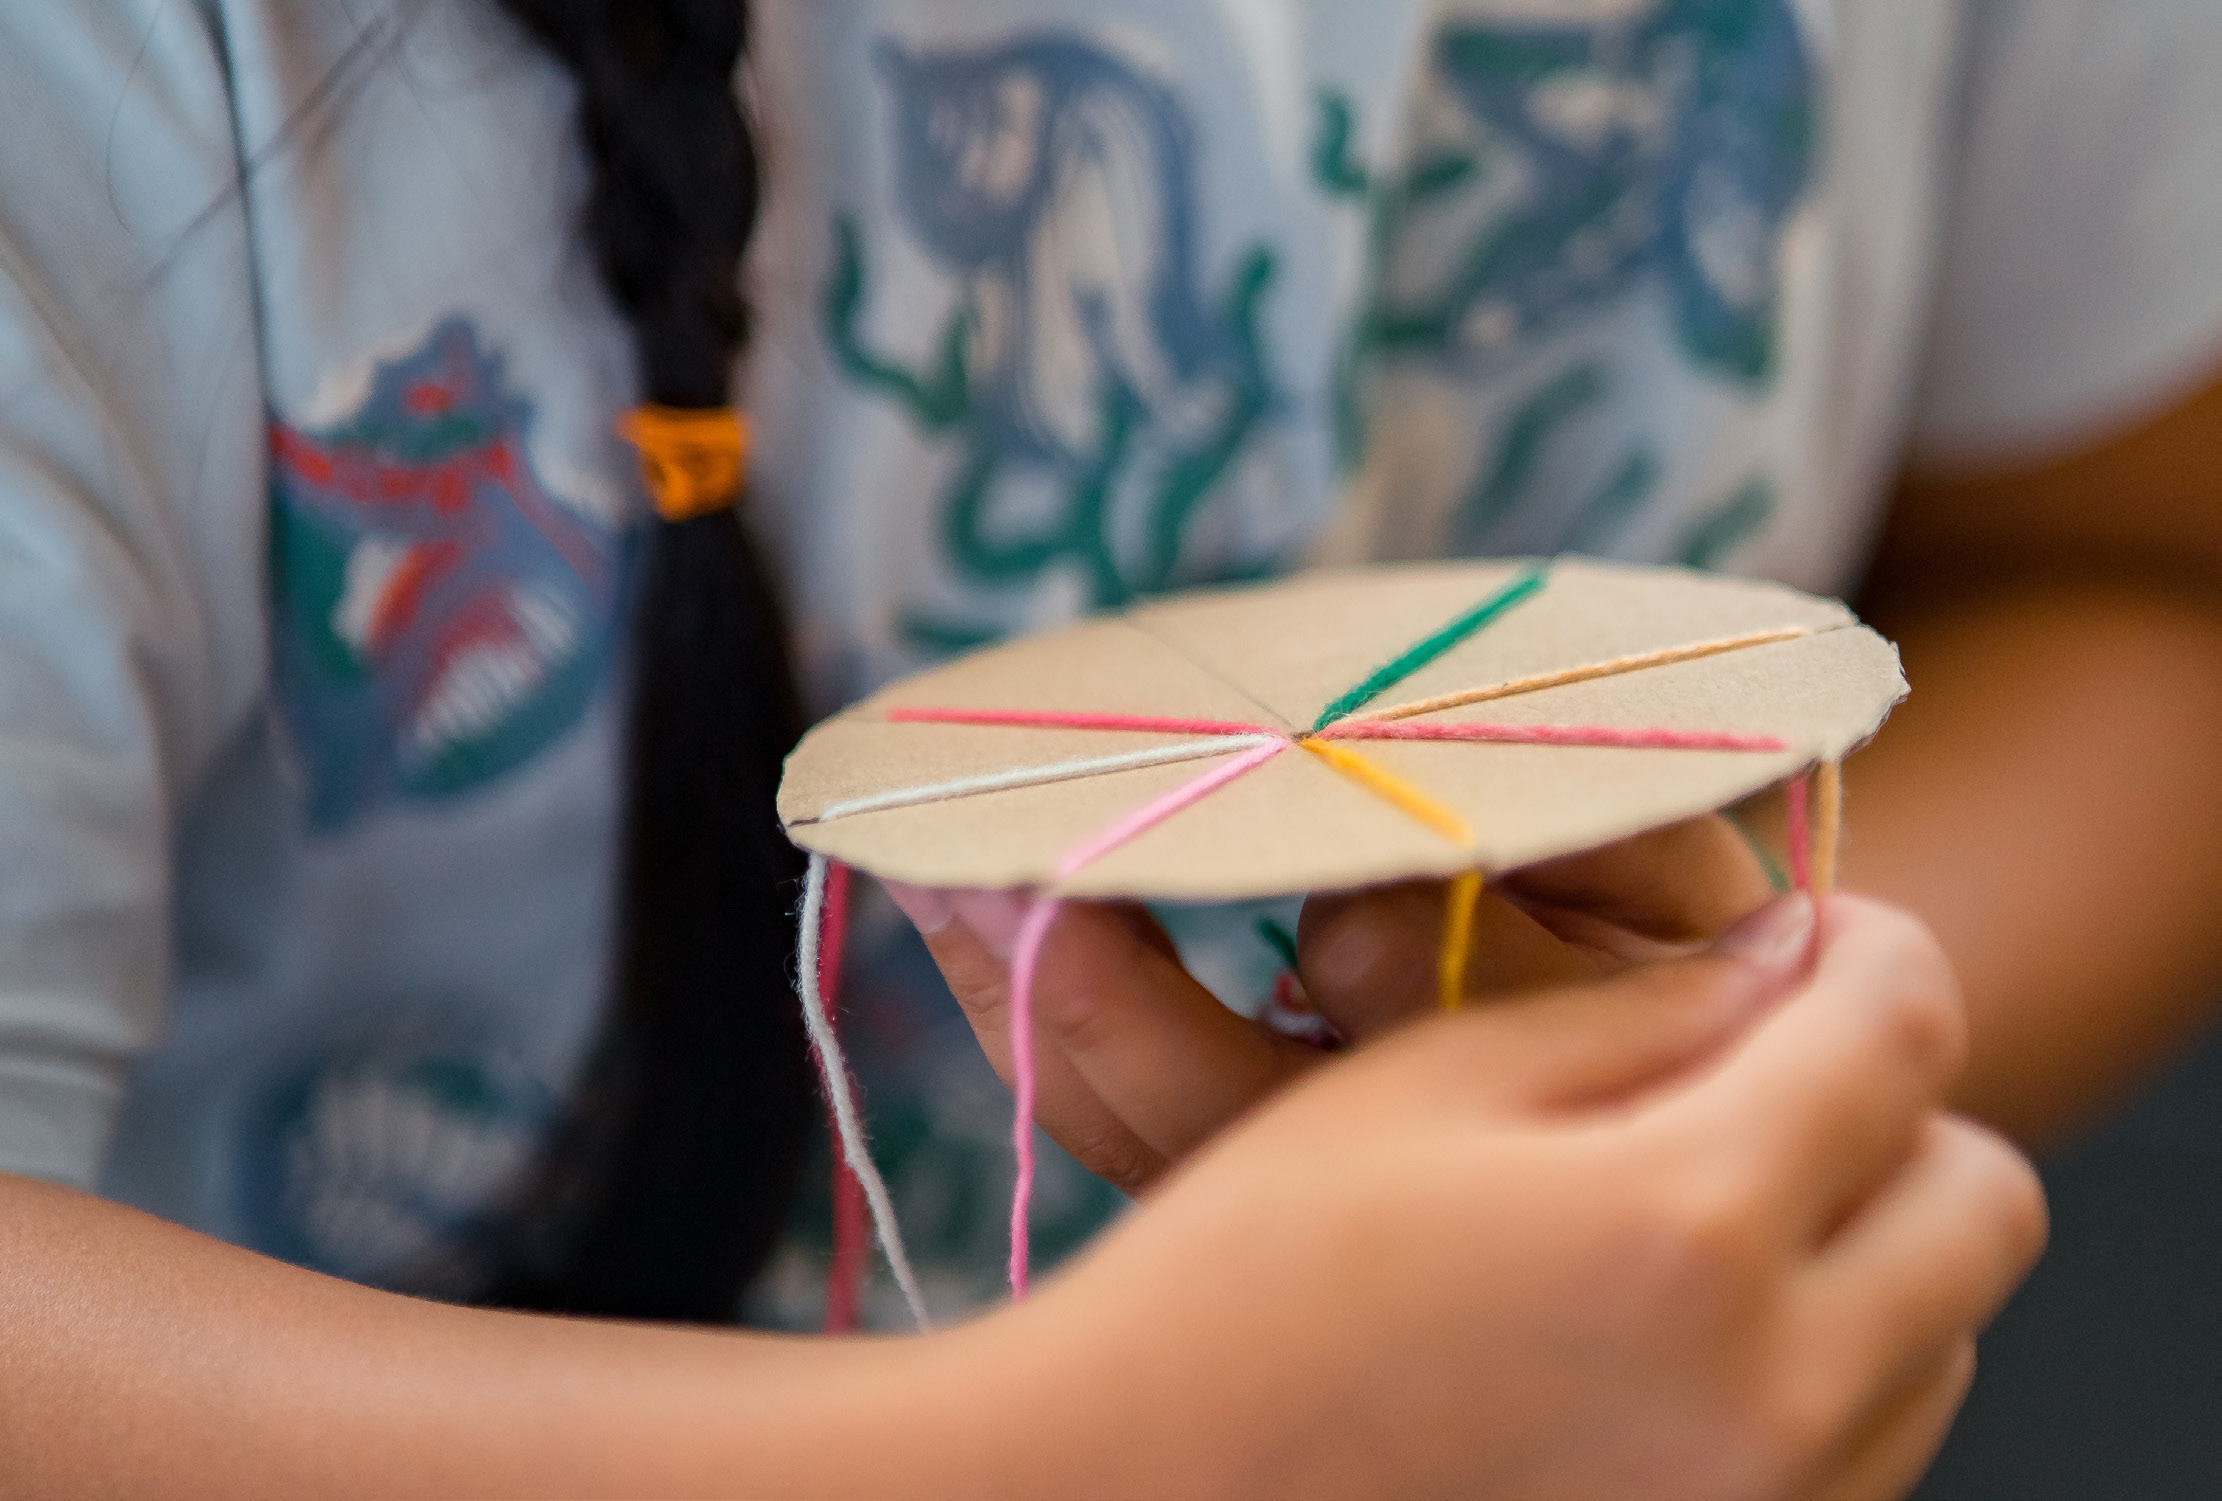
we recommend help from an adult. - Draw 8 small lines or dashes of the same length around the edge of your cardboard. Start your line from the edge of the circle and draw it toward the center. Make sure the lines do not touch the center hole. Make sure there is equal space between each line.
- Snip each dash using scissors. You will have 8 slits around your circle.
- Cut a piece of string so it is about the same size as your arm from shoulder to fingertip. Use this string to measure 6 more pieces.
- Hold all 7 strings at once. Tie them all together on one end into a knot.
- Grab your knot and push it through the hole in the middle of your cardboard circle, just enough so only the knot is on the other side.
- Hold your cardboard with the strings coming out of the top. Place each string in a slit and pull down until it is flat on the cardboard. One slit should be empty. You should end up with a snowflake design.
- To weave your bracelet, hold your cardboard so the empty slit is on top. Pretend your circle is a clock, the empty slit should be at 12 o’clock. Now count 3 numbers clockwise. Grab the 3rd string, and bring it to the empty slit.
- Bring the new empty slit to the top and count 3 strings to the right again. Bring the 3rd string to the empty slit. Repeat this over and over. As you do this, your bracelet will pop out of the bottom of the cardboard. As you go, you can keep pulling your knot down to see the bracelet.
- Once it’s long enough for a wrist, carefully pull your strings out of the slits.
- Tie your new bracelet onto a friend!